If you're finishing a basement, the first thing you need to think about is keeping water out. That means applying waterproof exterior wall coatings before backfilling. I've seen too many homeowners skip this step and pay for it later with moldy drywall and rotten studs. Exterior coatings are your first line of defense against groundwater, and if you do it right, you can avoid a lot of headaches.
Why Exterior Coatings Matter
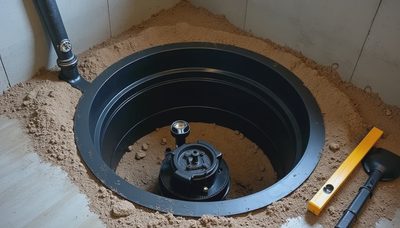
A lot of people think interior waterproofing — like a sump pump or a perimeter drain — is enough. It's not. Those systems handle water that already got in. Exterior coatings stop water before it reaches your foundation wall. I've worked on basements where the owner spent $5,000 on an interior drainage system only to find water seeping through hairline cracks. The fix? Dig up the outside and apply a proper coating. It's more work upfront, but it's the only way to guarantee a dry basement.
Waterproof exterior wall coatings are designed to bond to concrete or masonry and create a continuous barrier. They need to be flexible enough to bridge small cracks and durable enough to resist soil pressure. Most good coatings are applied in two coats, with a total thickness of 60 to 90 mils.

Types of Waterproof Exterior Wall Coatings
There are three main types you'll find at the supply house: rubberized asphalt, cementitious, and liquid membrane. Here's where they differ.
Rubberized asphalt is the old standard. It comes in a bucket, you trowel or spray it on. Brands like Damtite and Karnak are common. It's been around forever and works well, especially on rough concrete. The downside is it's messy and takes a while to cure. You need a dry forecast for at least 24 hours.
Cementitious coatings are mixed with water and applied like a thick paint. They're cheaper than rubberized, but they're not as flexible. They work fine on solid block walls with no movement, but on poured concrete with potential settling, they can crack. I only use these on retaining walls, not foundation walls.
Liquid membrane is what I recommend for most homeowners. It's a single-component urethane or acrylic that rolls or sprays on. It dries fast, bonds well, and stays flexible. Henry 587 and Tremco Vulkem are two products I've used on dozens of jobs. They're easier to apply and give a consistent thickness if you follow the coverage rate.
Application Tips That Matter
Getting the coating on is more than just opening a bucket. First, the wall has to be clean. No dirt, no oil, no loose concrete. I pressure wash everything, then let it dry for a day. Second, you need to address any cracks or cold joints before coating. For small cracks, use a hydraulic cement patching compound. For larger ones, you may need an injection. Third, pay attention to the coverage rate. Most liquid membranes require two coats at 30 to 40 mils each. Use a notched trowel or a gauge to check thickness.
A word about drain tile: if your foundation has a perimeter drain on the outside (and it should), the coating needs to extend down to the drain board. Don't stop a foot above the footing — that's asking for water to wick up behind the coating.

Common Mistakes to Avoid
The biggest mistake I see is thin coats. Some guys try to stretch a bucket of coating by applying one thin layer. That's worse than doing nothing. You need the full thickness. Another mistake is not mixing properly. Rubberized asphalt products have settled solids at the bottom. Unless you stir for a full 5 minutes, you're applying water on top and the actual barrier at the bottom of the bucket. Finally, don't apply in direct sun or when rain is expected within 12 hours. It causes pinholes or washes off the uncured coating.
Cost vs. Value
Waterproof exterior wall coatings cost anywhere from $0.50 to $1.50 per square foot for material alone, depending on the brand and type. Labor if you hire out adds another $2 to $4 per square foot. That's for digging, cleaning, coating, and backfilling. On a typical basement with 200 linear feet of wall 8 feet tall, that's 1,600 square feet. Material runs $800 to $2,400. Total job cost $3,200 to $8,800. Is it worth it? Absolutely. One water damage repair from a wet basement can cost $10,000 or more. Pound for pound, this is the best investment in your basement.
When to Reapply Exterior Wall Coatings
Waterproof exterior wall coatings don't last forever. Over time, soil movement, tree roots, and freeze-thaw cycles can compromise the barrier. If you notice damp spots inside after a heavy rain, it's time to inspect. Look for peeling or blistering on the exposed part of the foundation above grade — that's a sign the coating has failed below grade as well. I recommend checking every 5 to 7 years. If you see damage, you'll need to excavate again, clean the wall, and apply a fresh coat. It's a big job, but it's cheaper than replacing a finished basement.
To test an existing coating, wait for a dry week and dig down to the footing in one spot. If the coating peels off easily with a putty knife, it's shot. Reapply with a liquid membrane like Henry 587. Also, check your gutter downspouts and grading. Sometimes it's not the coating — it's water pooling against the wall because of poor drainage. Fix that first, then see if the coating holds.
Final Verdict
Do this: apply a two-coat liquid membrane waterproofing to your foundation walls before backfilling. Use a brand like Henry or Tremco, follow the coverage rate, and don't skip crack prep. Don't go with cheap cementitious coatings on a foundation that moves. And for the love of dry basements, don't rely on interior systems alone. Above grade is for the real estate photos. Below grade is where you actually live — keep it dry.
No letters yet — be the first guest to write.