The Moisture Battle Every Basement Owner Loses If They Guess Wrong
I can’t tell you how many times I’ve been called back to a “finished” basement where the homeowner proudly showed me their new rec room — only for me to find black spots growing behind the walls. The culprit? They got the moisture management backwards. Today we’re cutting through the confusion on two popular wall solutions: dimple board and rigid foam.
After installing both systems on over 300 basements around Indianapolis, I’ve learned exactly when each shines and where people screw them up. Let’s get into the real-world differences so you don’t waste thousands on a system that fights against physics.
What Each System Actually Does
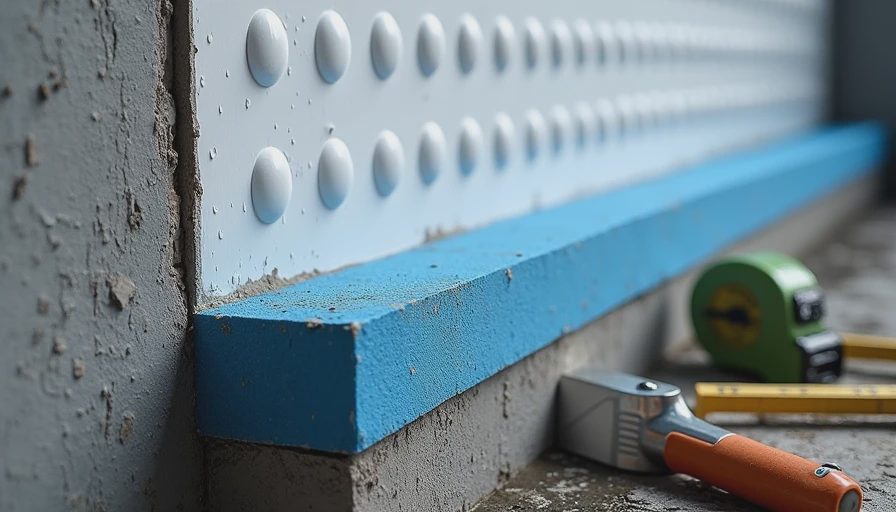
Dimple Board: The Drainage Superhero
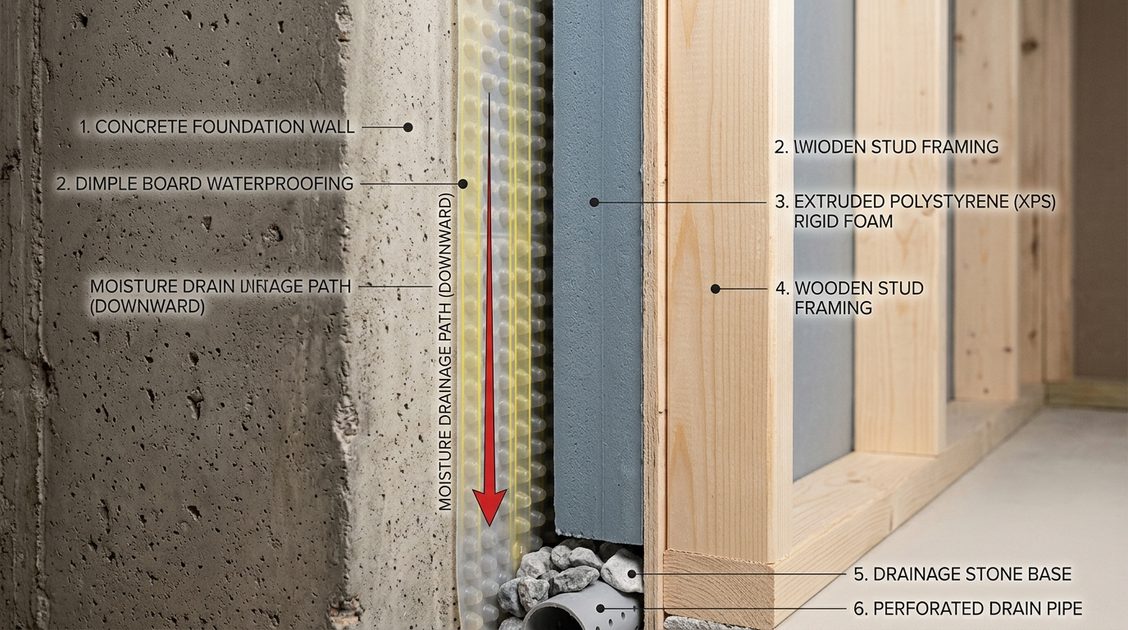
Dimple board (also called drainage mat) is a tough plastic sheet with raised bumps — think egg crate texture but way stronger. The dimples create an air gap against the foundation wall. Water that seeps through the concrete runs down behind the board into your drainage system instead of soaking into insulation or framing.
I’ve used this on dozens of older homes with active water issues. It’s forgiving and excellent at moving bulk water. The material is usually bright white or black HDPE plastic, tough enough to take a hammer hit without puncturing.
Rigid Foam Board: The Thermal and Vapor Warrior
Rigid foam — usually XPS (extruded polystyrene) or EPS — comes in thick sheets (1", 2", or more). It provides excellent insulation value while acting as a vapor barrier when installed correctly. Unlike fiberglass, it doesn’t absorb water easily.
The key debate always comes down to: which side faces the concrete wall?
The Critical Question: Which Side Does the Moisture Go?
Here’s the no-BS answer I give every homeowner:
For Dimple Board:
The dimples always face the concrete wall. This creates the drainage channel. The flat side faces your framing or insulation. You want water to stay in that air gap and drain downward to your perimeter drain or sump pit. I always seal the top edge carefully and make sure the bottom ties into a proper drainage system.
For Rigid Foam:
In most Midwest basements (including my own), I install the foam directly against the concrete. The foam itself becomes the primary vapor barrier. You do not put a separate plastic sheet between the foam and the wall — that traps moisture. The foam’s closed-cell structure handles minor moisture while stopping vapor drive from the cool wall into your warm basement air.
I’ve torn out too many jobs where someone put plastic behind the foam. That plastic became a condensation magnet. Learned that lesson the hard way on a 2012 project in Fishers that came back to haunt me two years later.
Real Job Comparison: What I Actually Recommend
When I Choose Dimple Board:
Homes with known water entry or poor exterior grading
Older foundations (pre-1980) with lots of cracks
Situations where maximum drainage capacity is needed
Budget-conscious projects where R-value can come from interior insulation
When I Choose Rigid Foam (or Combine Both):
Dry or mostly dry basements looking for maximum insulation
Newer poured concrete walls
Projects prioritizing energy efficiency and finished wall thickness
My personal favorite combo: dimple board against the wall + rigid foam against the dimple board for the best of both worlds
On my own basement, I went with the combo approach. Dimple board handles the occasional surprise leak, while the rigid foam gives me solid R-values without eating up too much floor space.
Installation Mistakes That Will Haunt You
Let me save you some pain:
Never leave gaps at the bottom. Water needs a clear path to your drain tile or sump. I always extend dimple board down into the perimeter trench.
Seal the top. Use appropriate tape or sealant at the top of the boards so moist air doesn’t sneak behind.
Fasten properly. Dimple board needs special plugs or furring strips. Cheap fasteners fail and create pressure points.
Think about the whole wall assembly. Vapor retarder direction matters based on your climate. In Indiana, we generally want the warm side vapor barrier (toward the living space).
Cost and Performance Reality Check
Dimple board runs cheaper upfront but often needs additional insulation. Rigid foam costs more per square foot but simplifies the wall assembly. On a typical 1,200 sq ft basement, the difference in material cost might be $800–$1,500, but the labor and long-term performance can swing much wider.
After watching both systems age over a decade, the combo approach has the best track record in my experience. Drainage first, then insulation and vapor control.
Lessons from the Field
I still remember one job in 2018 where the homeowner had watched a popular YouTube channel and installed rigid foam with plastic behind it. Two years later they had condensation dripping like a cave. We ripped everything out, installed proper dimple board with integrated drainage, added the foam on the interior side, and it’s been bone dry since.
Another time, a guy with a very wet foundation tried to save money with just rigid foam. Water found its way around the edges and we were back six months later. Sometimes you have to respect how much water your particular foundation produces.
The Bottom Line Recommendation
For most pre-2000 homes in the Midwest: Start with dimple board against the concrete for drainage peace of mind, then add rigid foam for insulation. Skip the separate plastic vapor barrier between them. Let the materials do their jobs.
Your basement walls don’t need to be complicated — they need to be smart. Manage the water first, control the vapor second, and insulate third.
Because above grade is for the real estate photos.
Below grade is where you actually live.
And nobody wants to live with a moldy surprise.



No letters yet — be the first guest to write.