
A simple living basement is not a showroom with six kinds of recessed lighting and a wet bar nobody uses. It is a dry, comfortable, practical room that earns its square footage every day. The best version might be a family room, office, guest space, playroom, or combination of all four. Before you buy flooring or sketch a media wall, deal with water, headroom, insulation, electrical work, and egress. Those details decide whether the room feels like part of the house or a decorated concrete box.
I have worked on more than enough basements where the owner started with paint and furniture, then discovered a damp wall behind the finished surface. That is an expensive way to learn that below-grade construction punishes shortcuts. A simple living basement starts with boring work that stays hidden: drainage, air sealing, framing clearance, and code checks. The payoff is a room you can use without worrying about every storm.
Start With a Dry, Honest Foundation
Walk the entire basement after a hard rain before planning the layout. Look for active leaks, white mineral deposits, damp corners, rust on metal, and cracks that change width. A thin vertical crack in poured concrete is often repairable, but horizontal cracking, bowing walls, or water pushing through joints deserves an engineer or foundation specialist before you finish anything.
Do not cover a water problem with paneling. Exterior grading, downspout extensions, footing drains, sump systems, and interior drainage each solve different problems. A sump pump with battery backup commonly costs a few hundred dollars in equipment, while a full drainage correction can run several thousand. That is still cheaper than removing drywall, insulation, and flooring after one spring storm.
For a simple living basement, I would also install a hygrometer and watch humidity through a full wet season. Keep indoor relative humidity around 30 to 50 percent with ventilation or a dehumidifier. A basement that smells musty when it looks dry is giving you useful information. Find the source before framing.
Design Around the Parts You Cannot Move
Measure the ceiling height from the concrete slab to the lowest obstruction, not just to the floor joists. Ductwork, beams, plumbing, and electrical cables can steal several inches. Many jurisdictions use different minimums for habitable rooms, hallways, stairs, and existing conditions, so confirm requirements with your local building department before ordering materials. A permit review is far less painful before walls are closed.
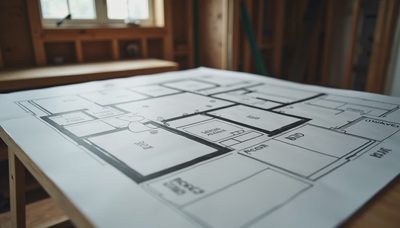
Use the mechanical room, columns, and low soffits to shape the plan instead of fighting them. A 12-inch-deep wall can hide pipes and create a clean edge for a television, but it also reduces floor area. Keep a clear path to the furnace, water heater, shutoff valves, cleanouts, and electrical panel. I have seen finished rooms where a technician would need to cut open a wall just to replace a filter or service a shutoff. That is not clever design; it is future demolition.
For furniture, draw the actual dimensions on the slab with chalk. A sectional that fits on paper can block a stair landing or leave only 24 inches between a table and the wall. Leave roughly 30 to 36 inches for comfortable walking routes, and keep doors from colliding with furniture.
Insulate Without Trapping Moisture
Basement insulation is where many otherwise careful projects go wrong. Cold concrete can condense moisture behind a wall, especially when fiberglass batts are pressed directly against the foundation. That hidden moisture can feed mold while the finished room still looks perfect.
A common approach is rigid foam board against the concrete, with seams taped or sealed, followed by a framed wall. The exact R-value and vapor-control method depend on your climate zone and local code. In much of the Midwest, I prefer a continuous insulation layer that keeps the interior framing warmer, then fiberglass or mineral wool in the stud cavities where the assembly allows it. Do not casually add polyethylene sheeting; in some assemblies it can trap moisture between two low-permeability layers.
Seal the rim joist carefully. Use properly rated spray foam or cut-and-sealed rigid foam pieces, and pay attention to plumbing penetrations and wiring holes. The rim joist is a common air leak and a major source of cold floors above. A simple living basement should feel steady in January, not like a drafty garage.
Spend the Budget Where It Changes Daily Life
A basic basement finish often lands somewhere between $25 and $75 per square foot when contractors handle much of the work, though plumbing, structural repairs, egress windows, and regional labor can push that higher. DIY labor can reduce the bill, but materials and permit requirements do not disappear. Price the project in phases rather than pretending the whole room will cost the first number in your spreadsheet.
Put money into waterproofing, insulation, lighting, flooring preparation, and enough electrical capacity. A new 20-amp circuit for a home office or entertainment equipment is more useful than decorative wall sconces. LED wafer lights can provide even illumination in a low ceiling, but plan access and spacing before drywall. Use GFCI protection where required around sinks, laundry areas, and other damp locations.
Flooring deserves a realistic choice. Luxury vinyl plank is popular because it handles ordinary basement humidity better than solid hardwood and is easy to clean. Even then, the slab must be dry, reasonably flat, and prepared according to the flooring manufacturer's instructions. Carpet can work in a reliably dry room, but carpet pad over a damp slab is an odor factory.

Make One Room Do Several Jobs
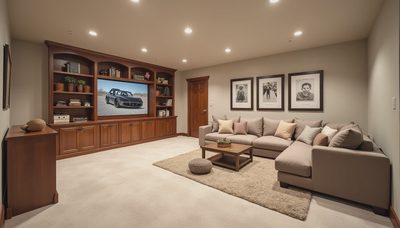
The strongest simple living basement usually has fewer permanent features. Instead of building a dedicated theater with fixed rows, use a comfortable sofa, movable chairs, and a wall-mounted screen. The same room can handle movie night, homework, board games, and guests. A durable table near an outlet can serve as a workbench for children during the week and a folding craft or sewing station later.
Storage is worth planning early. Build shallow cabinets under stairs, add closed storage near the entry, and leave room for sports equipment, vacuum cleaners, holiday bins, and tools. Open shelving looks tidy in a photograph and becomes a dust-covered collection of random objects in real life. Doors hide clutter and protect stored items from the occasional basement spider.
If the basement includes a bedroom, check egress rules before framing. A sleeping room generally needs an approved emergency escape opening, and the required clear opening, window well dimensions, ladder provisions, and height limits vary by local code. Cutting an egress window into a foundation is not a casual weekend upgrade; budget several thousand dollars when excavation, cutting, drainage, and window installation are involved.
A Practical Finish Sequence
Start by documenting the existing basement with photographs and measurements. Mark every water line, cleanout, junction box, valve, and floor drain. Then complete drainage and structural repairs, test humidity, and rough in plumbing and electrical after the layout is approved. Insulate and air-seal before framing cavities disappear. Install drywall only after inspections and after the room has stayed dry through meaningful weather.
Paint samples on the actual walls because basement light changes color dramatically. Use lighter colors if the ceiling is low, but do not confuse paint with lighting. A few well-placed fixtures on separate switches are more useful than a bright grid that makes the room feel like a retail store. Install trim that can tolerate minor cleaning and keep critical access panels reachable.
My own basement has changed three times because our family changed. The workbench moved, the kids needed a larger play area, and the storage requirements grew. That is why I favor simple wiring, movable furniture, and walls that are not packed with fragile built-ins. A simple living basement should adapt instead of becoming a monument to one year's lifestyle.
Bottom Line: Finish Less, Build Better
A simple living basement is successful when it stays dry, feels warm, provides useful light, and gives your family room to use it differently over time. Fix water before cosmetics. Confirm code requirements before framing. Insulate the foundation assembly correctly, protect access to equipment, and spend on the parts that are impossible to replace later.
Skip the elaborate bar if it means delaying drainage repairs. Skip solid hardwood if the slab and humidity do not support it. Skip the bargain insulation shortcut that leaves cold concrete behind a finished wall. Above grade is for the real estate photos. Below grade is where you actually live. Build the basement around that truth, and the room will be easier to maintain, cheaper to operate, and far less likely to become your next demolition project.

No letters yet — be the first guest to write.