
An underconsumption basement is not a sad room with a folding chair and one bare bulb. It is a deliberate way to finish below-grade space by buying less, reusing what works, and refusing upgrades that do not solve a real problem. If your unfinished basement is dry, reasonably comfortable, and structurally sound, you can create useful living space without turning it into a $60,000 showroom.
The first rule is simple: spend money on water control, safety, and the building envelope before you spend it on finishes. A bargain sofa cannot rescue a basement with a leaking foundation. I have seen homeowners install beautiful flooring over a slab that still wicked moisture, then rip the entire room apart two summers later. Underconsumption basement planning starts with avoiding that mistake.
What an underconsumption basement should include
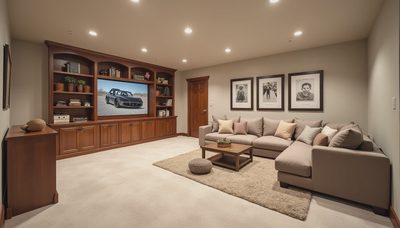
Start by deciding what the basement needs to do. A television room, playroom, workshop, guest room, and storage area do not require the same construction. You might need a framed wall and electrical outlets for a home office, but you probably do not need a wet bar with a second refrigerator. A family room can work with a $300 used sectional, a good floor lamp, and a wall-mounted television instead of custom cabinetry and built-in speakers.
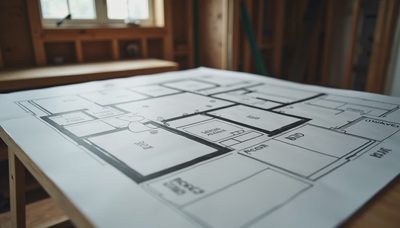
Measure the ceiling height, identify existing columns and ductwork, and mark every water or electrical line before drawing a layout. Keep the plan close to the foundation walls when possible. Every unnecessary partition costs framing lumber, drywall, joint compound, paint, and several hours of labor. In my own 1998 Indianapolis basement, I left one concrete utility wall exposed instead of framing around it. It is not magazine-perfect, but it is straight, durable, and easy to inspect.
Reuse is valuable when it is safe. Existing shelving, solid interior doors, a sound vanity, and cabinets from an upstairs remodel can all find a second life below grade. Do not reuse water-damaged carpet, swollen particleboard, musty insulation, or painted materials you cannot identify. Cheap does not mean free when the removal bill arrives.
Fix moisture before buying anything pretty
Before an underconsumption basement becomes a finishing project, test the room after heavy rain. Look for damp concrete, white mineral deposits, staining below windows, active cracks, and water around the sump pit. A dehumidifier hiding a persistent leak is not waterproofing; it is a noisy delay.
Handle exterior drainage first when possible. Clean gutters, extend downspouts at least several feet from the foundation, and correct soil that slopes toward the house. A small crack that stays dry is often cosmetic, but a crack that widens, leaks, or appears with a bowed wall deserves a qualified structural inspection. Do not cover it with foam board and hope for the best.
For a basement that needs interior drainage, costs can range from a few hundred dollars for minor grading and downspout work to several thousand for a perimeter drain and sump system. A $3,000 pump setup is unnecessary for every dry basement, but a reliable primary pump, a properly sized discharge line, and a battery backup can be sensible where the water table is high or power outages are common.
Keep indoor humidity around 30% to 50%. Run a dehumidifier with a drain hose if the space stays damp, and leave enough clearance around it for airflow. Mold-resistant drywall is not a substitute for controlling moisture. No drywall product can make a wet basement dry.
Insulate and frame only where it helps
The cheapest basement wall is not always the best basement wall. Fiberglass batts placed directly against a concrete foundation can absorb moisture and create a hidden mold problem. Use a wall assembly appropriate for your climate and local code, such as rigid foam or closed-cell spray foam installed with careful attention to seams and fire protection. Product requirements differ, so follow the manufacturer instructions and local inspection rules.
For many older homes, two inches of rigid foam provides a meaningful thermal break, but the correct thickness depends on climate zone, foundation condition, and code requirements. Seal joints with compatible tape or foam, and do not block electrical boxes, cleanouts, shutoff valves, or the sump access.
Frame walls with enough clearance to keep wood away from damp concrete. Pressure-treated bottom plates are commonly required where framing touches concrete, with an approved gasket or sill material beneath them. Use a laser or chalk line; basement floors rarely run as straight as they look. A wall that wanders by an inch can make drywall, trim, and cabinets fight you for the rest of the project.
An underconsumption basement often benefits from a smaller finished footprint. Leave mechanical equipment accessible, preserve storage under stairs, and avoid boxing in pipes that might need service. A simple painted utility zone is more useful than a sealed-off closet that forces a plumber to cut drywall later.

Choose finishes that tolerate real basement life
Luxury vinyl plank is popular because many products handle occasional surface moisture better than standard laminate, but the concrete slab still needs to be tested and prepared according to the flooring instructions. Do not install flooring over visible dampness, standing water, or an unresolved crack. Carpet tiles can be practical in a dry basement because one damaged square can be replaced instead of removing an entire room. They are a poor choice where the slab has a moisture history.
Painted drywall is usually enough for walls. Save expensive panel systems for areas where frequent access or impact resistance justifies the price. A basic LED surface fixture often provides better light than several decorative cans, especially where ceiling joists and ductwork make recessed installation difficult. Use fixtures rated for the location and have permanent electrical work inspected as required.
For furniture, buy used pieces only after checking for odors, pests, water damage, and unstable frames. A washable area rug, curtains, and a few lamps can make a concrete-heavy room feel finished without filling a dumpster with packaging. Underconsumption basement design is not anti-comfort; it is anti-waste.
A practical spending order
Put the budget in this order: water management, structural repairs, electrical safety, insulation, code-required windows, framing, drywall, flooring, lighting, and furniture. That order prevents a common failure pattern: spending $8,000 on finishes while postponing a $1,500 drainage repair until the finished room is in the way.
An egress window is not optional simply because a basement bedroom has a comfortable mattress. Requirements vary by jurisdiction, but sleeping rooms generally need an emergency escape opening with minimum dimensions and a usable window well. Confirm the local rules before framing. Cutting concrete for an egress window can cost several thousand dollars, yet it is a safety project, not a decorative upgrade.
Set a cash limit for each phase and buy materials only when the next phase is ready. Store drywall off the floor, protect lumber from dampness, and keep receipts for products with warranty requirements. If the project pauses for six months, leave the basement clean enough to inspect after storms.
The bottom line on an underconsumption basement
An underconsumption basement works when you make the room dependable before making it attractive. Fix water, keep access to equipment, use a sensible wall assembly, meet electrical and egress requirements, and furnish the space with durable items you can repair or replace individually.
Skip the fake luxury: oversized bars, fragile flooring, complicated ceiling details, and storage cabinets that consume the entire budget. Spend on the parts you cannot see, then make the visible parts simple. Above grade is for the real estate photos. Below grade is where you actually live. The best underconsumption basement is dry, safe, comfortable, and useful on an ordinary Tuesday night.

No letters yet — be the first guest to write.