Basement waterproofing is not a bucket of sealer and a Saturday afternoon with a paint roller. Water follows pressure, cracks, joints, poor grading, and the path of least resistance. If you finish a basement before solving those problems, you can bury the evidence behind drywall and discover it later as swollen trim, musty insulation, or black spotting on the framing. I have repaired enough finished basements to know that the cheapest time to fix water is before the room exists.
Start by Finding the Water's Real Entry Point
Before buying a pump or coating, walk the basement after a hard rain. Look for damp lines at the wall-floor joint, isolated puddles under windows, staining around plumbing penetrations, and white powdery deposits called efflorescence. A vertical crack with dry staining is different from an active crack that darkens during rain. Mark each location with painter's tape and take photographs during wet weather.
Outside, check whether soil slopes away from the foundation. A practical target is roughly 6 inches of fall in the first 10 feet, although local site conditions and codes can affect what is possible. Clean the gutters and confirm downspouts discharge several feet away instead of dumping beside the wall. A clogged gutter can put a surprising amount of water against a foundation. This basic inspection is the first step in basement waterproofing because it separates a drainage problem from a structural or plumbing problem.
Do not ignore water that appears far from an exterior wall. A failed water heater, leaking supply line, condensation on cold pipes, or a floor drain backup can look like foundation leakage. Dry the area, run fixtures one at a time, and watch the water meter if you suspect a hidden supply leak.
Exterior Basement Waterproofing Usually Comes First
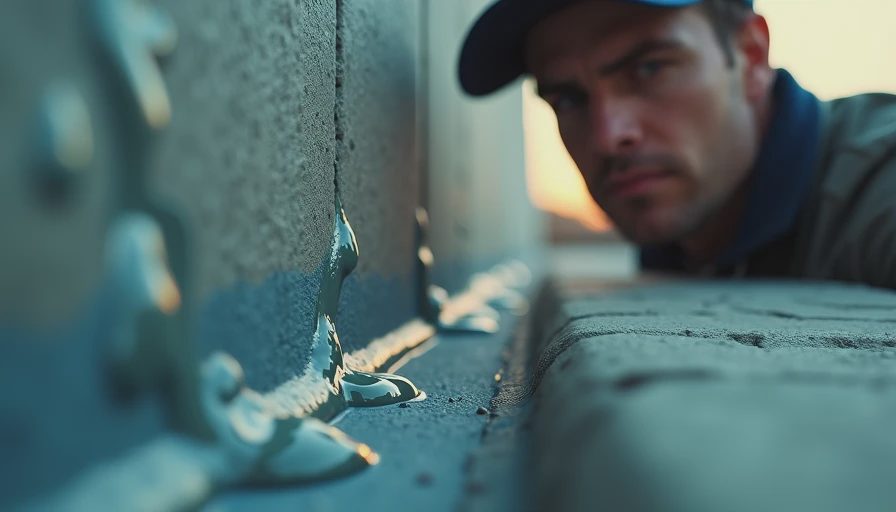
If the foundation wall is accessible and the soil is the source, exterior basement waterproofing is often the most direct repair. The typical process involves excavating beside the wall, cleaning the masonry, repairing cracks, applying a compatible waterproofing membrane, protecting it with drainage material, and checking the footing drain. It is disruptive and commonly costs several thousand dollars for one wall, but it addresses water before it enters the foundation.
This is not a job for a shallow trench and a smear of tar. Excavation beside a foundation can cave in, damage utilities, or undermine a footing when done carelessly. A contractor should identify buried gas, electric, water, and communication lines before digging. If the wall is deep, the soil is unstable, or the excavation will approach a neighboring property, bring in an experienced waterproofing crew.
Downspout extensions and regrading can solve a surprising number of wet-basement complaints for a few hundred dollars in materials. They will not fix a failed footing drain or a foundation crack under hydrostatic pressure, but they should be handled before expensive interior work. Water management is a system, not a single product.
When Interior Drainage Makes More Sense
Interior basement waterproofing is often the practical answer when excavation is impossible, too expensive, or blocked by a porch, driveway, addition, or property line. A contractor can cut a narrow section of slab around the perimeter, install perforated drain pipe in clean stone, connect it to a sump basin, and replace the concrete. Water is collected after it enters and directed to the pump instead of being allowed to spread across the floor.
A proper sump system needs more than a plastic basin and a pump sitting at the bottom. The basin should have a sealed lid where required, a reliable check valve, and a discharge line that carries water well away from the foundation. I like a battery backup or secondary pump when a basement contains a furnace, electrical panel, finished rooms, or anything else that would make a flood expensive. Test the primary pump by pouring water into the basin, not by merely lifting the float.
Interior drainage is not a magic cure for every crack. It controls water at the floor level, while a wall crack can still allow dampness higher up. That is why basement waterproofing plans sometimes combine a drainage channel with crack injection or exterior repairs.

Foundation Cracks, Windows, and Wall Joints
Small vertical cracks in poured concrete are common as concrete shrinks. A narrow, stable crack may be repaired with polyurethane injection, which remains flexible when the wall moves slightly. Epoxy is stronger and can bond the crack, but it is less forgiving if movement continues. Neither product should be chosen by label alone. A crack that widens, offsets, leaks heavily, or runs diagonally from a foundation corner deserves a structural evaluation.
Block foundations behave differently. Water can travel through hollow cores and appear several feet from the outside entry point. Coating one visible spot may leave the actual path untouched. Look at mortar joints, wall corners, and the top course beneath the sill plate.
Basement windows are another common failure point. Check the window well for leaves and sediment, confirm the drain is open, and make sure the window closes tightly. If the basement will become a bedroom, egress requirements apply, and the minimum opening dimensions vary by code and location. Do not waterproof a window well by creating a sealed bowl with nowhere for water to go. It needs a functional drain or a properly designed connection to the drainage system.
Materials I Would Actually Use
For concrete cracks, I prefer repair systems designed for wet conditions rather than generic caulk. Hydraulic cement can stop a fast leak temporarily, but it is rigid and can fail when the crack moves. Cementitious coatings can help with minor dampness on sound masonry, though they will not withstand serious hydrostatic pressure indefinitely. Waterproof paint is useful as a finishing layer after the source is controlled, not as the primary repair.
For insulation and framing, leave a serviceable gap between the wall and finished materials when the assembly requires it. Do not trap damp concrete behind fiberglass batts and plastic sheeting. Basement walls need a moisture-aware design, and vapor retarder requirements differ by climate and assembly. A closed-cell spray foam system, rigid foam, or a carefully detailed framed wall may be appropriate, but the choice should account for fire protection, electrical access, and local code.
The most expensive waterproofing mistake I see is covering a wet wall because the room has a deadline. New drywall can hide the problem for months, then absorb enough moisture to require demolition. Spend the money on drainage first. Flooring, paint, and trim come after the basement stays dry through several storms.
A Practical Budget and Maintenance Plan
Minor basement waterproofing work, such as extending downspouts, sealing a few penetrations, or correcting surface grading, can cost a few hundred dollars if you do the labor. Crack repairs often land in the several-hundred-dollar range. Interior drainage and a sump installation commonly run from several thousand dollars upward, depending on slab length, access, electrical work, and discharge conditions. Exterior excavation can cost more because of equipment, soil removal, landscaping, and the length and depth of the wall.
Get written scopes that explain where water is collected, where it is discharged, what is included in concrete replacement, and whether the repair has a workmanship warranty. Be suspicious of a salesperson who recommends the same system for every house or promises a permanently dry basement without inspecting the outside.
After the work, clean gutters twice a year, inspect downspout outlets, test the sump before storm season, and keep storage off the floor until you trust the system. A cheap water alarm near the sump and water heater can give you an early warning. Check the basement after the first major freeze and thaw as well as after heavy summer storms.
The bottom line is simple: basement waterproofing is water control, not wall decoration. Start outside, repair the actual entry path, install interior drainage when the site demands it, and test the system before framing. Above grade is for the real estate photos. Below grade is where you actually live.


No letters yet — be the first guest to write.