If you're finishing a basement, you've probably stood in the insulation aisle staring at a stack of blueboard insulation and wondering whether it's worth the money. Blueboard insulation — the rigid blue foam sheets made by Dow under its Styrofoam brand, plus the same XPS product sold in other colors — is one of the most common basement insulation materials in America. But common doesn't mean automatic. The stuff only earns its keep if you install it on the right side of the wall, at the right thickness, and without trapping moisture behind it. I've ripped out more of it than I've installed, so let me walk you through what actually matters.
What Blueboard Insulation Actually Is
Let's get the name straight first. Blueboard insulation is extruded polystyrene, or XPS — a closed-cell rigid foam that gets its blue color from Dow's manufacturing process. The pink version is Owens Corning Foamular, the same material with a different dye job. If a clerk hands you a white or green sheet, don't panic; it's the same product in different packaging.
The exception is blue gypsum board, which some people also call blue board. That's a base for veneer plaster, not insulation. Strapping it to your foundation wall won't help your heating bill, and it'll crumble if it gets damp.
Why It Earns Its Keep Below Grade
XPS belongs on basement walls for one simple reason: it's closed-cell, so water vapor can't soak into it. Fiberglass batts against a concrete foundation wall are the classic rookie mistake. They absorb condensation, turn into a mouse hotel, and give you that musty basement smell no plug-in air freshener will fix.
This foam, by contrast, does double duty as insulation and a vapor retarder. It also keeps warm air away from the cold concrete, so condensation never forms in the first place. I put a 2-inch layer on every basement wall I finish. Stop moisture before it starts, and you've solved most basement problems for good.

Thickness, R-Value, and What It Costs
XPS delivers about R-5 per inch, so 2-inch blueboard insulation lands you at R-10, and 3-inch gets you to R-15. For a basement rec room, 2-inch is plenty in most climates. Step up to 3-inch if you're building in Minnesota or Wisconsin.
Here's the money picture. A 4x8 sheet of 2-inch XPS covers 32 square feet and runs about $35 at the big-box stores. A 1,000-square-foot basement with 8-foot walls has roughly 1,050 square feet of wall area, so you're buying about 33 sheets. That's just over $1,100 for the foam before adhesive, tape, and lumber.
It's not cheap, and I won't pretend otherwise. But it's the one place you should never cut corners. Repainting walls in 20 years costs a weekend. Tearing out moldy drywall and rotted studs costs ten times what that foam would have cost on day one.
How to Install Blueboard Insulation Without Screwing It Up
Most contractors mount blueboard insulation directly against the foundation wall, and you can too — just get the order right. Start with a moisture test. Tape a 12-inch square of plastic sheeting to the concrete and leave it 24 hours. If water beads underneath, you have a water problem, not an insulation problem. White chalky efflorescence on the block tells the same story. Any visible leak or damp spot means stop.
Once the wall is dry, run a continuous bead of foam-board adhesive on the back and press the first sheet into place. The boards will slide while the adhesive cures, so pin them with plastic cap nails or fender washers. Stagger the seams like brickwork, leave a half-inch gap at the bottom, and tape every seam with the manufacturer's tape. The foil roll in the duct aisle won't hold up.
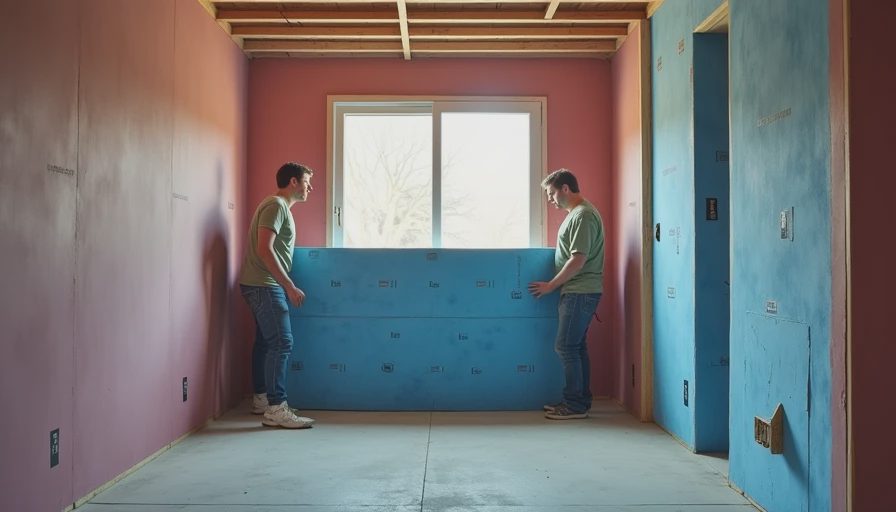
Here's the vapor barrier answer: blueboard insulation is already a vapor retarder. Do not staple poly sheeting over it on the warm side. That builds a double vapor barrier, which traps condensation between the concrete and the plastic.
Once the foam is up, screw 1x3 furring strips through it into the concrete with a hammer drill and Tapcon-style anchors, 16 inches on center. If you're building interior walls or running electrical, skip the furring and build a 2x4 stud wall in front of the foam. Use pressure-treated lumber for the bottom plate on the slab.
The Mistakes I Tear Out Every Year
You learn some of this by fixing other people's work. The saddest job I walked into had blueboard insulation glued to the concrete, a stud wall in front of it, drywall, the works — and zero tape on the seams. It looked great for three years. Then the room smelled like a wet dog every spring. Moisture was slipping through the untaped gaps, condensing against the cold concrete, and running down into the bottom plates. The whole wall system came out.
Another common find: rigid foam on the basement floor without checking the slab first. Foam makes a fine subfloor, but only if the slab is dry and the seams are sealed. Skip that, and you've built a hidden reservoir that will ruin your laminate from below.
The Bottom Line on Blueboard Insulation
Here's my bottom line: blueboard insulation is the right call for basement walls in almost every situation. Two inches of XPS directly against the concrete, seams taped, stud wall in front, and no poly over it. Fix the water problem first, then spend the money. Your basement will stay warm and dry for as long as you own the house. Skip the tape, double up the vapor barrier, or lay fiberglass against the block, and you'll be calling someone like me in a few years. That's a call you don't want to make.


No letters yet — be the first guest to write.