If you're finishing a basement or dealing with water seepage, you've probably heard the term "basement waterproofing channel" thrown around. It's not a fancy gadget—it's a simple trench system installed around the interior perimeter of your basement floor to catch groundwater before it ruins your drywall. I've installed hundreds of these over the years, and I can tell you: when done right, a basement waterproofing channel is the single most effective way to keep a below-grade space dry.
A basement waterproofing channel works by intercepting water that comes through the cove joint where the wall meets the floor. Instead of letting that water pool on your slab, the channel directs it to a sump pump or gravity drain. It's essentially a French drain, but indoors. The channel itself is a PVC or ABS trough, usually 4 to 6 inches wide, covered with a grating or perforated cap. Water seeps in, gravel or a filter fabric keeps the silt out, and your sump pump does the rest.
I've seen homeowners try to skip this step and just paint on waterproofing. That might work for a year, but eventually hydrostatic pressure finds the weak spots. A proper basement waterproofing channel is the only guarantee that your finished basement stays dry.
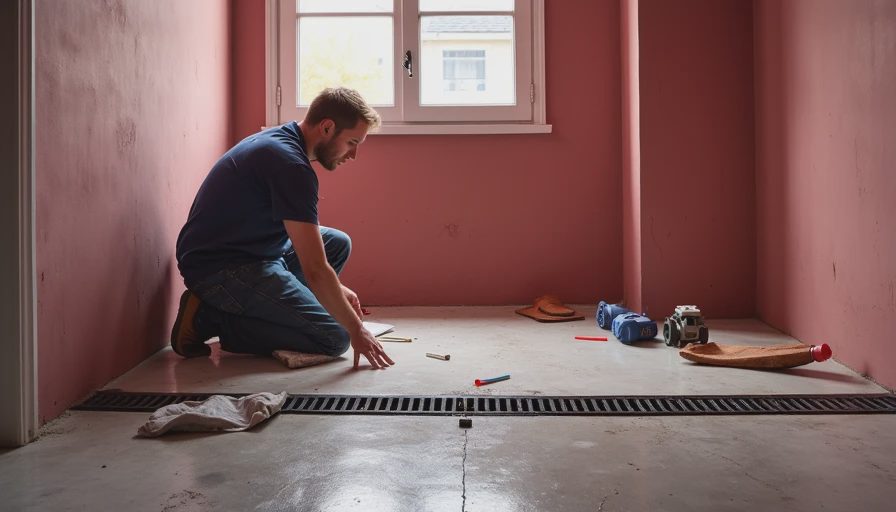
How a Basement Waterproofing Channel Works
Let me walk through the basics. Water builds up in the soil around your foundation. When that water pressure exceeds the weight of your slab, it pushes moisture through cracks and the cove joint. A basement waterproofing channel gives that water an easier path. The channel sits below slab level, so water naturally flows into it. Then it travels along the channel to a sump pit, where a pump sends it outside.
Most channels use a gravel bed around the pipe to improve drainage. The gravel acts as a buffer, keeping the pipe from getting clogged with silt. Some systems use a dimple board that wraps the wall and ties into the channel. That's overkill for most basements unless you've got serious groundwater issues. In my experience, a simple PVC channel with a filter fabric sock is sufficient for 90% of homes.
The key to making a basement waterproofing channel work is the slope. The channel must slope at least 1/8 inch per foot toward the sump pit. No slope means standing water in the channel, which is just a breeding ground for mold. I always pour a sloping concrete floor before installing the channel to ensure positive drainage.
Installing a Basement Waterproofing Channel: The Right Way
There's a right way and a wrong way. The wrong way: sawcut the floor, dig a trench, drop in a pipe, and backfill with concrete. That's a recipe for clogged pipes and water backup. The right way: sawcut the floor with a diamond blade, dig a trench 12 inches deep and 8 inches wide, lay a bed of 3/4-inch washed gravel, place your pipe on top, cover with more gravel, wrap everything in filter fabric, and then pour a concrete cover that's flush with the slab. That way, the channel can be cleaned if needed.
I've also seen contractors cut corners by using non-perforated pipe. Don't do that. You need a perforated pipe to collect water along the entire length. Also, make sure you install a cleanout point at the high end of the run so you can flush the system if it gets clogged.

Common Mistakes Homeowners Make
The biggest mistake I see is not extending the basement waterproofing channel far enough. It needs to wrap the entire perimeter where water intrusion is possible. I had a customer in Indianapolis who only did the back wall because that's where the water showed. Two years later, water came through the front wall after a heavy rain. He had to rip out his flooring and install a second channel. Do it once, do it all.
Another mistake: using the wrong size pipe. A 4-inch channel is standard, but if you have a large basement or heavy clay soil, step up to a 6-inch. Bigger pipe moves more water and clogs less often. And for the love of concrete, don't forget to install a sump pump. A channel without a pump is just a fancy trench. Water has to go somewhere.
Cost and Lifespan
A basement waterproofing channel installation runs $30 to $50 per linear foot, depending on your region and whether you need to break up existing concrete. That includes materials and labor. For a typical 30x40 basement, you're looking at $4,000 to $7,000 for the full perimeter. It's not cheap, but it's a fraction of what you'd pay to fix water damage later.
A properly installed channel should last 20 to 30 years. The gravel and pipe are impervious to rot. The only thing that fails is the sump pump. Replace that every 5 to 7 years, and you'll have a dry basement for decades.
Bottom Line
A basement waterproofing channel is not optional if you want to finish your basement. It's the difference between a usable living space and a moldy nightmare. I've ripped out too many finished basements that were built without one. Don't make that mistake. Spend the money, install it right, and you'll never think about water again.
Do this. Don't skip it.


No letters yet — be the first guest to write.